


If you are like me and require a VPN to access resources for work but don’t want your personal traffic to be routed through your corporate tunnel, then you might be interested in this little trick I figured out.
(I actually use this trick for another reason as well but I’ll come to that at the end.)
Let’s get straight to work!
The traffic routing we are setting up:
My Mac <--Work trafic--> SSH Proxy <---> WORK VPN <---> hidden Server
       \
        ---Private trafic--> Internet
1. Setup an SSH server
In my setup I have booted up a Nanode on Linode running Ubuntu. I’m accessing the vps using the built in ssh client in MacOS Terminal and after logging in, I fully updated the server.
sudo apt-get update && apt-get upgrade
First step over! Since you successfully SSH:ed into your server using an SSH client half the work is already done.
(We will go over configuring the VPN on the SSH Server / VPS in a later step)
2. Configure computer to use SOCKS proxy
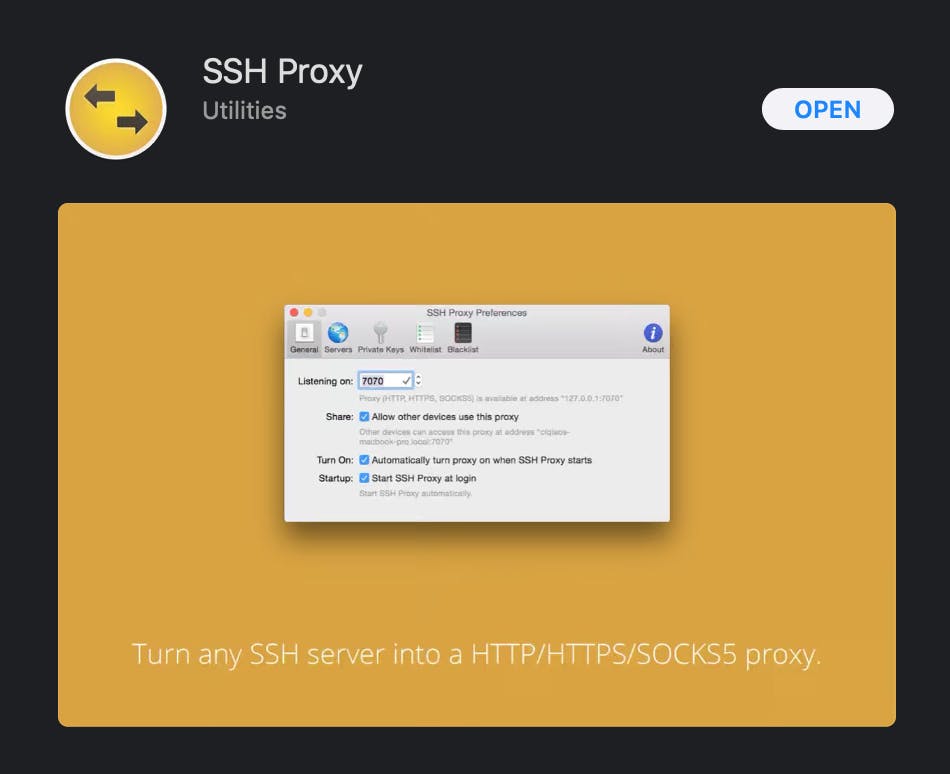
(I am using MacOS so I’ll walk through the steps as they were for me, sorry Windows users T__T) I am using a SSH client called “SSH Proxy” to to handle the split tunnelling on my machine, it’s free and comes with whitelist and blacklist features. Here’s a screenshot from the App Store.
Going forward I’m going to use this as a client, I think other clients setup will be similar.
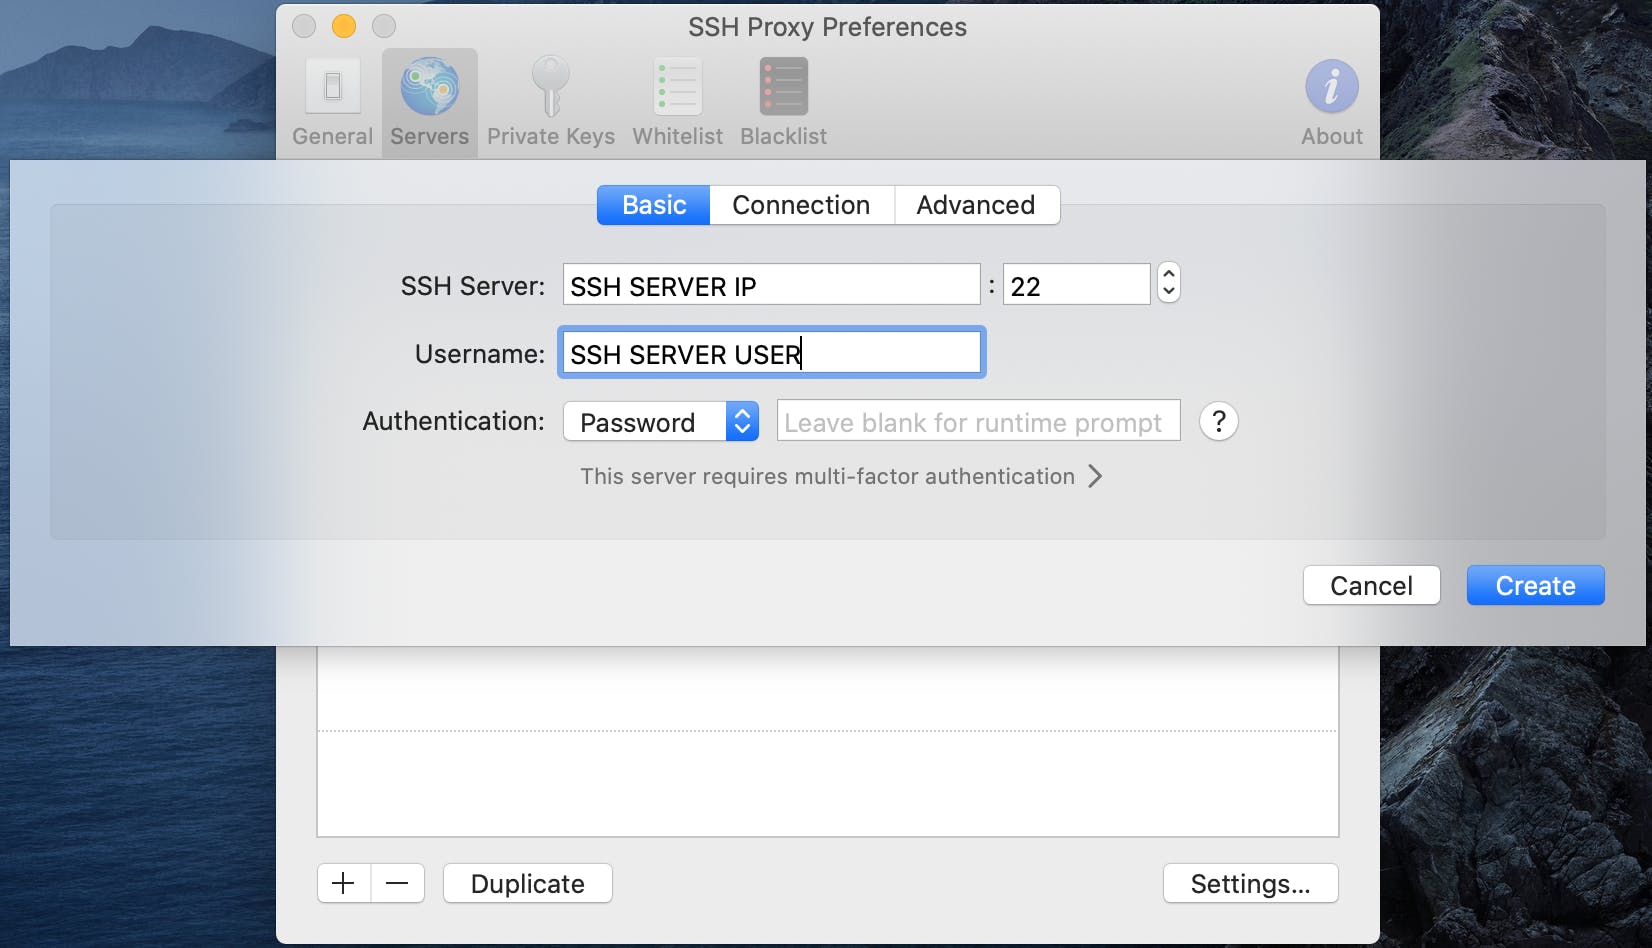
Open SSH Proxy and go to Preferences, Server tab to configure the server settings. Click the little plus sign to add an SSH server.
ADD
- SSH Server: This is the IP address to you SSH server / VPS
- SSH Port: Default on linux is port 22
- Username: The user on your SSH Server / VPS
- Authentication: Password for the SSH Server / VPS
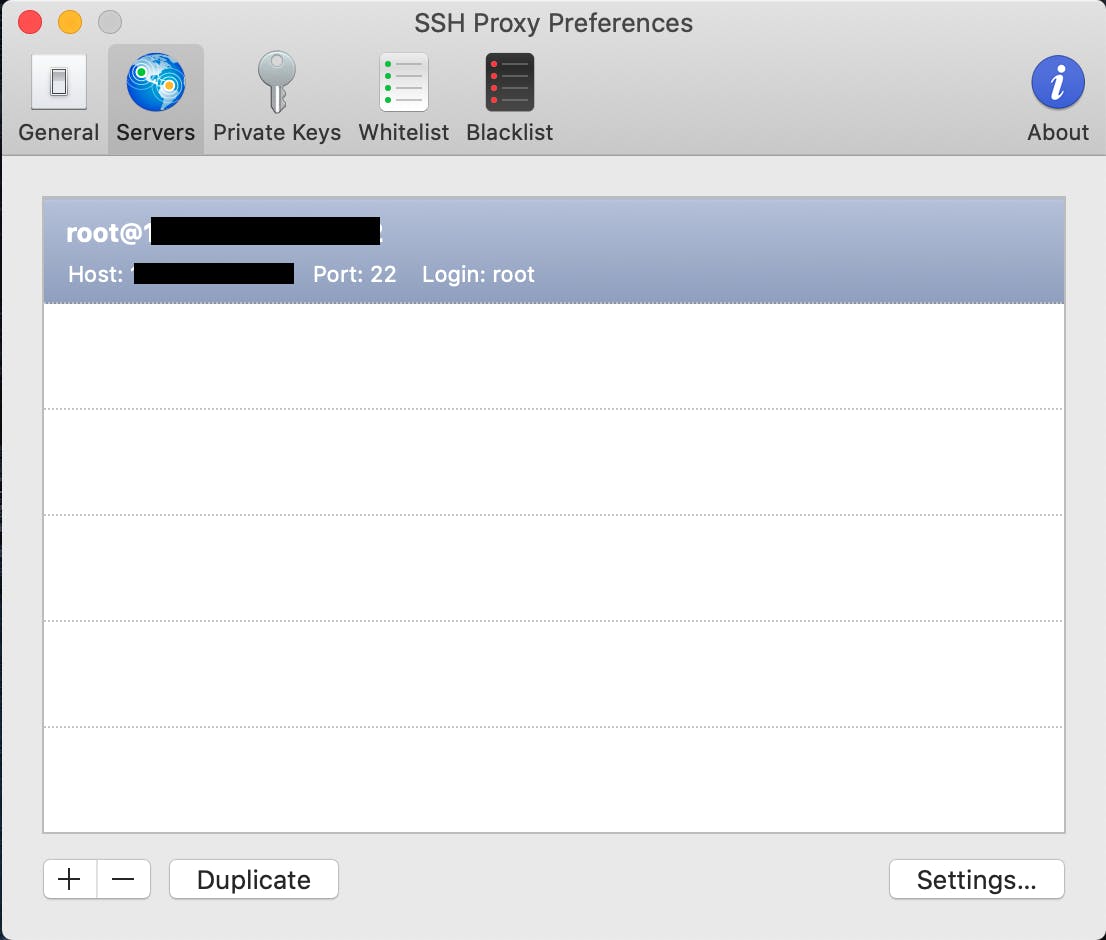
click create and you land on the screen below:
In the system menu bar in MacOS start the connection and test if it works, and, if you are like me who only want’s to tunnel work traffic through the SSH Proxy then apply the option to “Use Proxy Only for Sites on Whitelist”
It means any IP addresses or URLs that you add to the whitelist will tunnel.

If the connection is successful you can move on to the next step which is configuring the network settings in MacOS. If it’s not I suggest you look at your SSH Account settings on the SSH Server, double check the IP address, accounts, and IP.
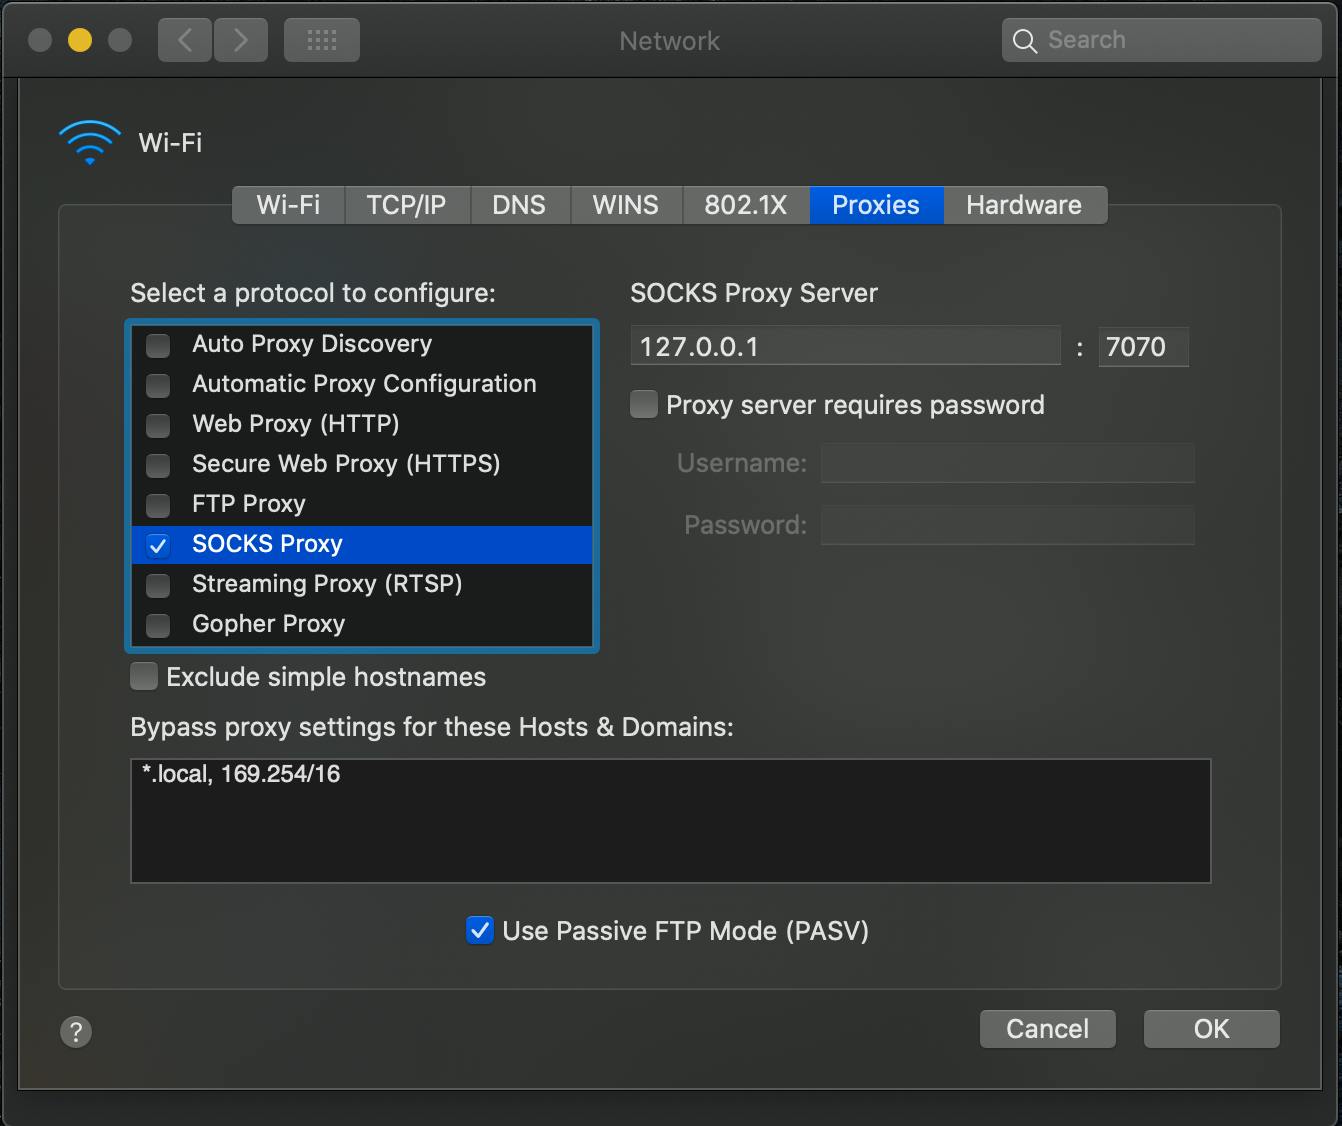
3. Configure your Network Settings
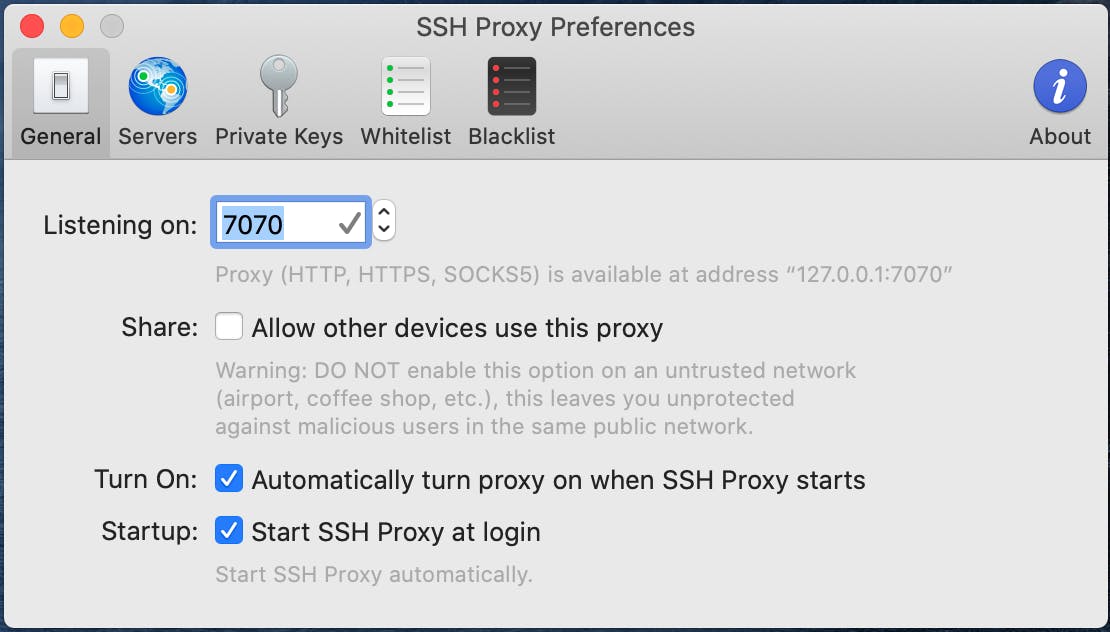
We need to configure our network to tunnel traffic through the SSH Proxy Client that we have installed on our system. We can find the information we need on the General tab in the SSH Proxy clients Preferences shown below. By default it uses port 7070, and Proxy (HTTP, HTTPS, SOCKS5) is available at address “127.0.0.1:{PORT}”.
For the network I’m configuring it as a SOCKS Proxy as below:
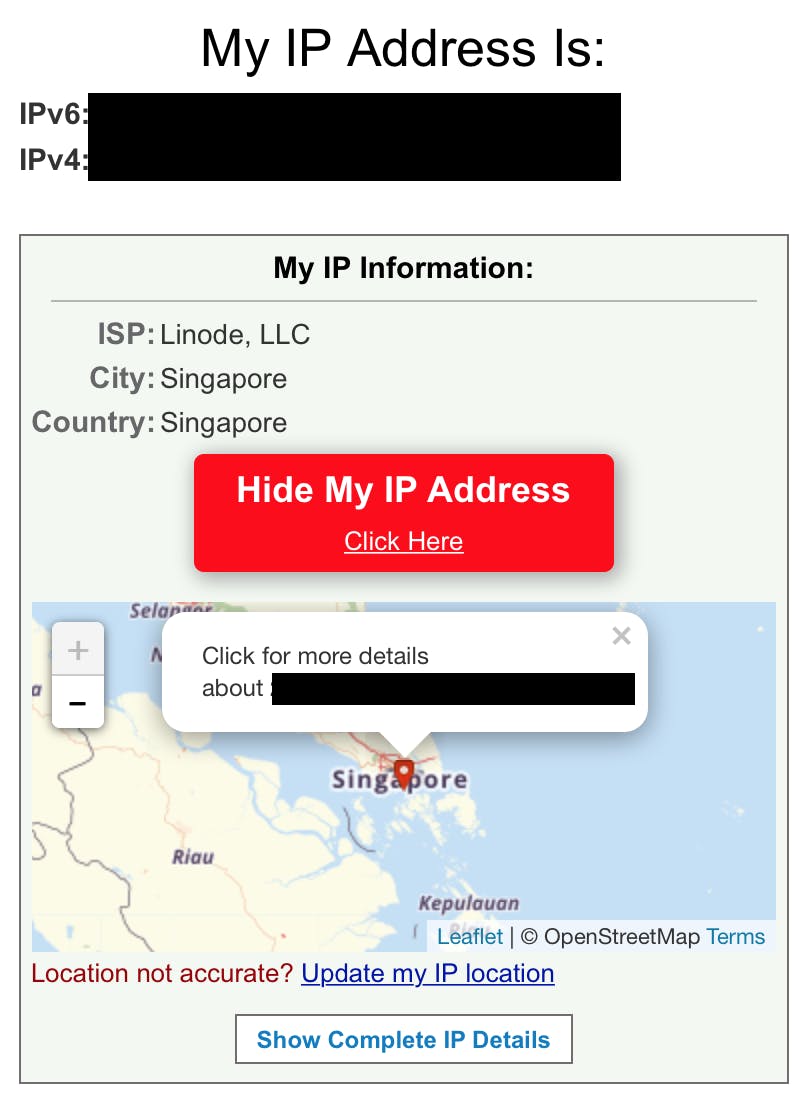
After doing this configuration all traffic now goes through our SSH Client and it will then direct traffic accordingly to your whitelist list. We can test this out by for instance adding whatismyipaddress.com to your whitelist and checking your IP. It should be in the same location as your SSH Server / VPS, in my case Singapore.
4. Configure your SSH Server / VPS VPN
So far we have only redirected our traffic to another place, which works great for obfuscating your location, or circumventing censorship by ISP or Governments. This type of redirection is sometimes called “a poor mans vpn”.
Now we want access resources behind our company’s firewall, in this case it means connecting our SSH Server / VPS to our corporate VPN. The first thing we need to do is configure the SSH Server to still listen to the same SSH ports even after connecting to the VPN. If we don’t configure it to listen and the nature of establishing a virtual private network we will loose contact with out SSH Server and we’ll need to reboot it in able to access it again.
Luckily I found an easy way to do this.
Connect via SSH with a terminal to your Server and do the following commands:
ip rule add from x.x.x.x table 128
ip route add table 128 to y.y.y.y/y dev ethX
ip route add table 128 default via z.z.z.z
Where x.x.x.x is your Servers's public IP, y.y.y.y/y should be the subnet of your Servers's public IP address, ethX should be your Servers's public Ethernet interface, and z.z.z.z should be the default gateway.
for example:
ip rule add from 172.16.9.132 table 128
ip route add table 128 to 172.16.9.0/24 dev eth0
ip route add table 128 default via 172.16.9.1
If you can still access the Server through SSH it probably means the routing works.
Thanks to for helping me figure that out: serverfault.com/questions/659955/allowing-s.. linode.com/community/questions/7381/openvpn..
Now, on your Server it’s time to download, install and connect to your work VPN.
My server is running Ubuntu so here’s what i did to install OpenVPN and establish my connection. I think this is where things can diverge a little depending on how your corporate VPN is setup.
sudo apt-get update
sudo apt-get install openvpn
From IT I got an openvpn configuration file to use for my account, I uploaded it to my Server and started my connection like the following:
sudo openvpn --config [pathname to file]
After getting the VPN to connect and testing that you can still connect to your server via SSH, and that you can access your corporate restricted resources from your mac you are good to go, only one thing left to do. If you close the terminal window with the VPN connection it will stop that service, which is not ideal, the whole point of this solution is to set it up and forget about it.
In order to accomplish this, we need to call openvpn using systemd to trigger a daemon on the background. First we need to make a copy of our config file to make sure the daemon picks it up we move it to:
cp [path to file] /etc/openvpn/client.conf
once the config file has been copied over we can start the daemon using systemctl
sudo systemctl start openvpn@client.service
(Thanks José)
or to just send the process into the background you can run the command like this with an & character to the end:
sudo openvpn --config [pathname to file] &
Now you can close your SSH terminal window and bask in glorious control over where your traffic goes.
That's it!
Final Words
I have been using this solution for well over 6 months now, and it has been working flawlessly, and actually one of my colleagues have been using it as well.
Also when connecting to the corporate VPN directly from my computer it sends ALL traffic through it, which is not ideal.
The whole reason I needed to do this from the beginning is because the location I am in have strict VPN laws and have implemented bots who systematically bans “un-registered vpns”, so one day they closed down my direct access to the corporate VPN, meaning I had to come up with a solution to circumvent the government censorship somehow.
The SSH access to my server is not blocked in any way, and it works fine, and since I only send backend API requests over it the bandwidth is low enough for it not being discovered by censor-bots.
But I actually use an additional VPN on my Mac which sends my traffic to another server before sending it to my SSH Proxy server.
Like this:
My Mac<--->VPN1<--Work-Trafic-->SSH-Proxy<--->VPN2<--->Servers
             \
              ---Private Trafic--> Internet
What I actually have found is that this is a really good solution, because I don’t have to think about my private traffic. When I get off work I don’t need to disconnect anything.
It is truly a set up and forget about it solution, and no matter where I’m situated I will continue to use this or similar.