


Ever had an NPM package that never get's updated even though you make changes from time to time. I do! which I talked about in a previous post: cross-platform-react-native-scroll-picker-component. It's time to make my life just slightly easier and automate the publish step with GitHub Actions.
Since the release of GitHub Actions everyone I know has been raving about them, so In an attempt to learn a little bit, and solve a problem I have, I thought I could try it out :)
oh and here's the official GitHub Actions docs: GH Actions Docs
Goal
It's important to know what you want to do, before starting configuring (or.. doing anything, really!). For me it's going to be something quite simple, but very useful.
This is my starting point and what I want to achieve:
- I have an open-source package that is published to NPM
- When I make a new "official"
releaseon GitHub I want to update / re-publish this package, so my updates go live.
To do this manually we need to login in and publish/re-publish through the NPM CLI, something like this:
# Authenticating with npm
$ npm login

# Publish the package
$ npm publish
I know, I know, it's not a massive amount of work to do those two steps each time I want to push out an update to the package, but we are learning something here.
Prior to GitHub Actions in order to automate this task, I would have needed to involve a third party CI/CD solution, and on top, it's free.
So let's get started with the config.
Preparing our repo to use GitHub Actions
The execution chains or jobs that we want to run inside of our GitHub Actions are called workflows.
So GitHub will look inside .github/workflows for workflows/execution chains so let's make a .github folder inside of our root, this folder is common if there are special configurations to the repository, like code owners. Further, we need to make a folder inside our .github folder called workflows.
When all is done you'll have a root/.github/workflows folder.
Like most CI/CD solutions GitHub Actions workflows are configured using a .yml file, and we need to put that file into the workflow folder we created above. I named my yml-file npm-publish.yml and here's a badly made folder tree to make it more clear.
---> root
|   ---> .github
|      ----> workflows
|          ----> npm-publish.yml // contains our workflows.
| ----> rest of app
Configuring our workflow
So inside of our npm-publish.yml we are good to go configuring our workflow. I'll post the finished thing first and then I'll go through it step by step what it does.
name: Npm Publish

on:
  release:
    types: [published]

jobs:
  build:
    runs-on: ubuntu-latest
    steps:
      - uses: actions/checkout@v2
      - uses: actions/setup-node@v1
        with:
          node-version: 12
          registry-url: https://registry.npmjs.org/
      - run: yarn install
      - run: npm publish --access public
        env:
          NODE_AUTH_TOKEN: ${{secrets.NPM_AUTH_TOKEN}}
Let's break it down
name: Npm Publish
Giving the workflow a name, at the very top we give the encompassing workflow a name that makes sense to us, you are free to name it anything you'd like :)
on:
  release:
    types: [published]
The on-keyword tells GitHub when the workflow is going to run, in this case, I specify that I want it to run when there is a new release, and more specifically I want it when the release type is published. This is important and required because releases could also be updated or deleted. This makes sure that we run on release publish only.
jobs:
  build:
    runs-on: ubuntu-latest
The jobs keyword tells our CI the different steps we want to execute.
In this case, I want to build the project, on the latest version of Ubuntu, so that is specified as ubuntu-latest.
Further, we need to define the steps within our job:
   steps:
      - uses: actions/checkout@v2
      - uses: actions/setup-node@v1
        with:
          node-version: 12
          registry-url: https://registry.npmjs.org/
      - run: yarn install
      - run: npm publish --access public
Inside of our job we are now defining the steps, We already defined the operating system of our virtual machine / box, so we are at the same stage as when we run the project locally on our computer.
Well, in plain English, what do we do locally when we run a project like this?
Normally it would look something like this in our terminal:
1. Clone our project
$ git clone git:repo-address
2. Install all packages/dependencies
$ yarn install
3. do the publishing steps
$ npm login
$ npm Publish
Locally we already have our development environment setup, we already have node, yarn, etc. But because we are essentially creating a new computer on GitHub servers running Ubuntu we need to be more specific, and that's what we are doing in the configuration file:
1. Clone the repo.
- uses: actions/checkout@v2
2. Install node on a known working version, Specify what package registry we want to use.
    - uses: actions/setup-node@v1
        with:
          node-version: 12
          registry-url: https://registry.npmjs.org/
3. Install dependencies
- run: yarn install
4. Publish to NPM
- run: npm publish --access public
5. Further, since there is no human sitting and looking at the script to authenticate us by passing in username and password, we need to pass a pre-authenticated token to our node environment
        env:
          NODE_AUTH_TOKEN: ${{secrets.NPM_AUTH_TOKEN}}
And that's our new GitHub Action workflow configuration all done 🎉
Hold on! you might say, what about that NPM Auth token thingy?
Let's get that configured next.
Configuring Auth tokens
As I described earlier we need a pre-authenticated token to pass into our node environment. This is the way we authenticate towards NPM, and it's not very complicated to setup.
Never put your token into the configuration file, it should be kept private
Note: I presume you have an account on npmjs.org if you are interested in following along.
Head on over to your account in npm and in the quick account menu press Auth Tokens
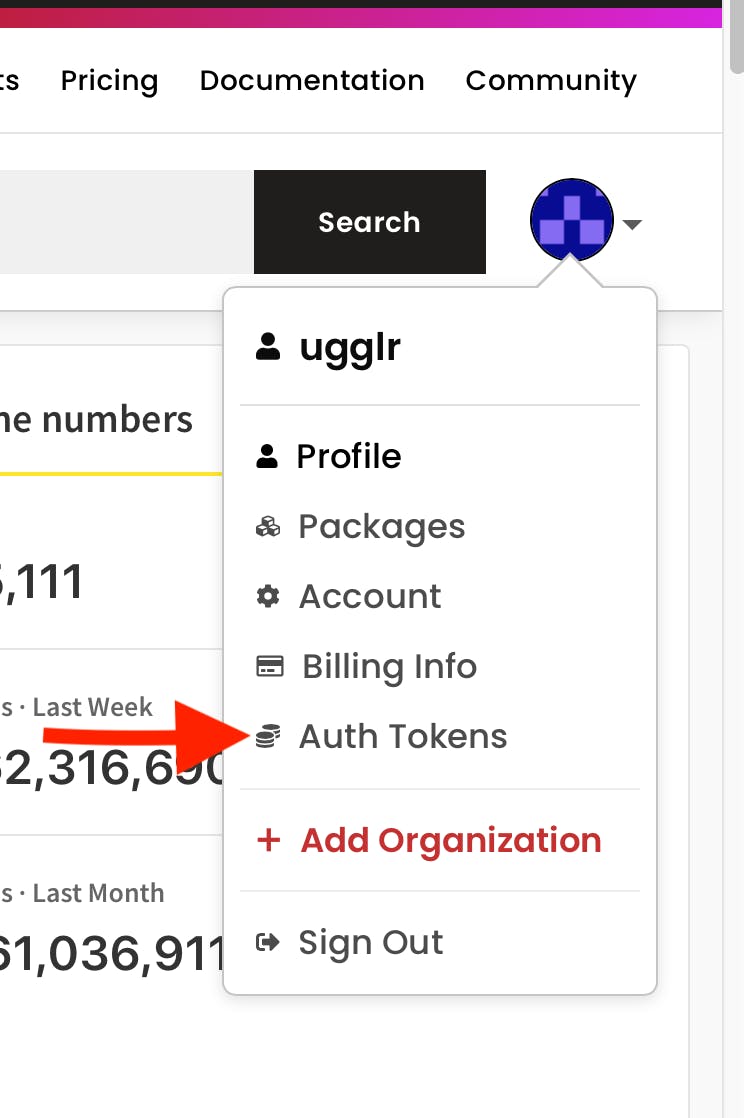
Inside the Auth Token page you'll want to create a new Token.

You will then be prompted if you want to grant the token read and publish or just read, for the purpose in this case we need to have publishing rights, so read and publish it is.

After the token has been created copy it, and make sure you can keep it with you for a little while until we add it into our repository secrets.
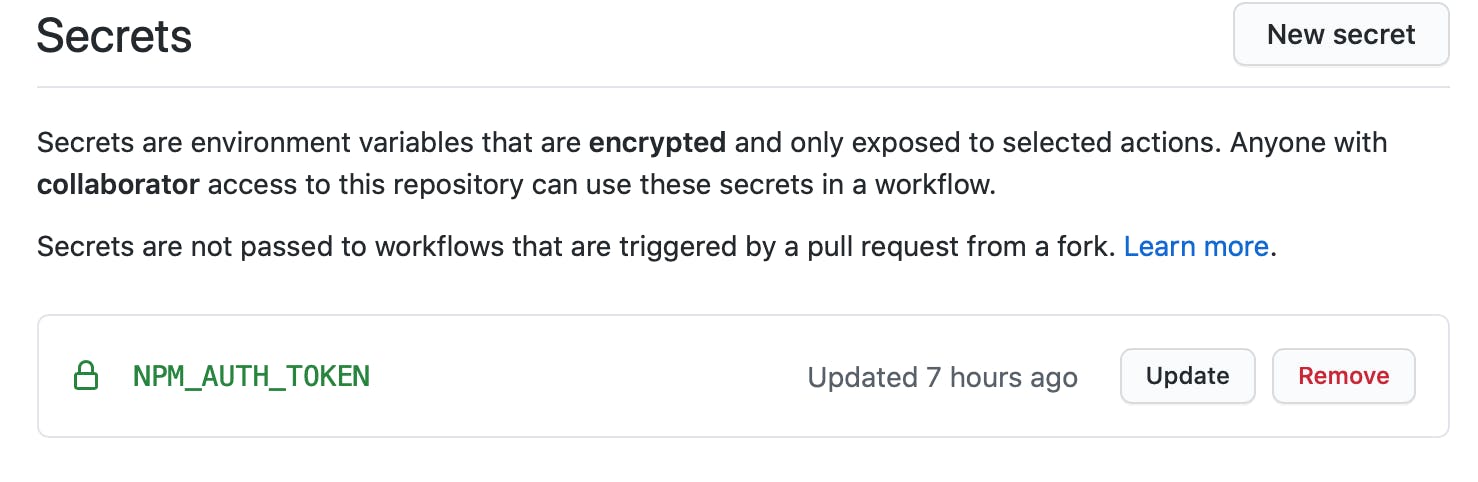
Adding NPM token to our repository
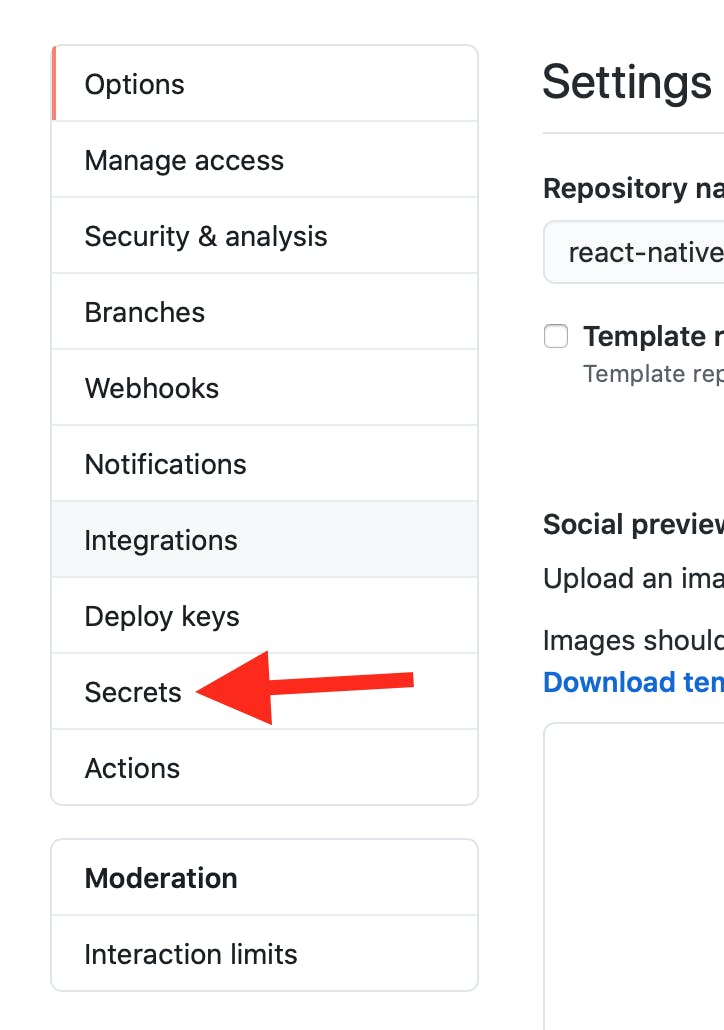
Head over to your GitHub repository where your package exists and go to the settings page.

Inside of settings head on over to the secrets sub-page.
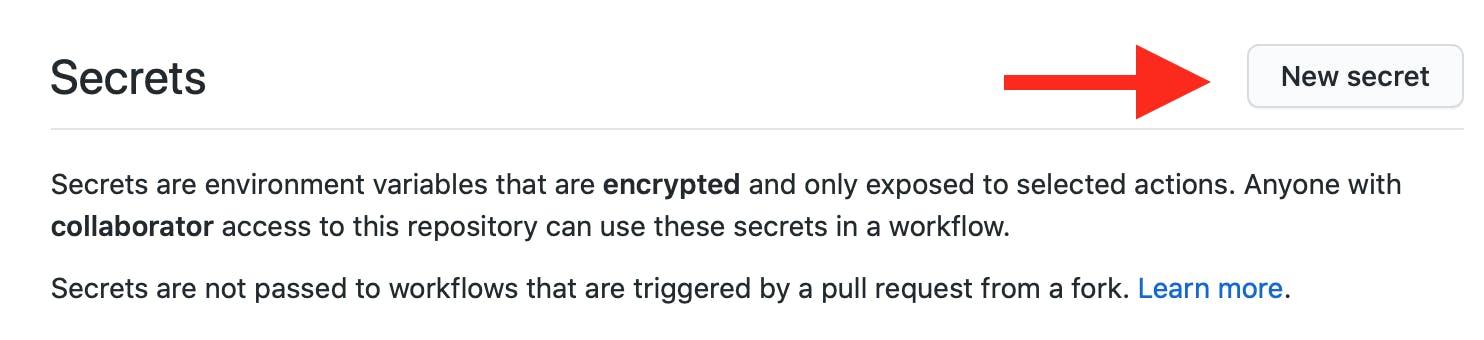
Click Create a new Secret
And here you'll want to match the name of the token with what we wrote in our action configuration file.
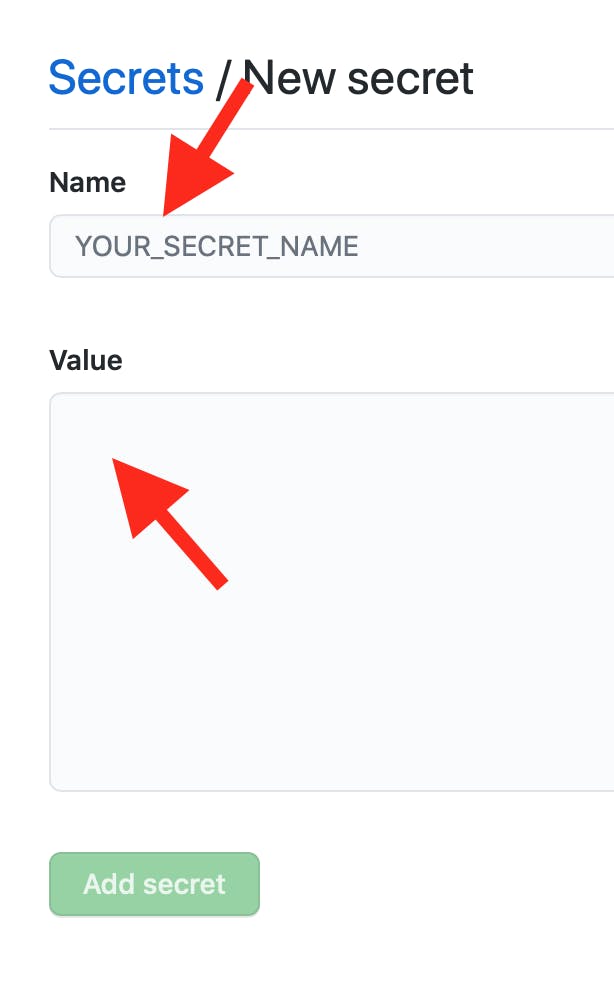
In our case, we named our secret variable reference NPM_AUTH_TOKEN and then you'll want to paste the token you got from NPM in the value field.
When everything is well and done we will have it added.
That's all we need for configuration, commit it, merge into master and let's try it out to see if it works.
Testing it out
So, to test our newly created workflow we need to make a new release (published), since that what we configured it to trigger on.
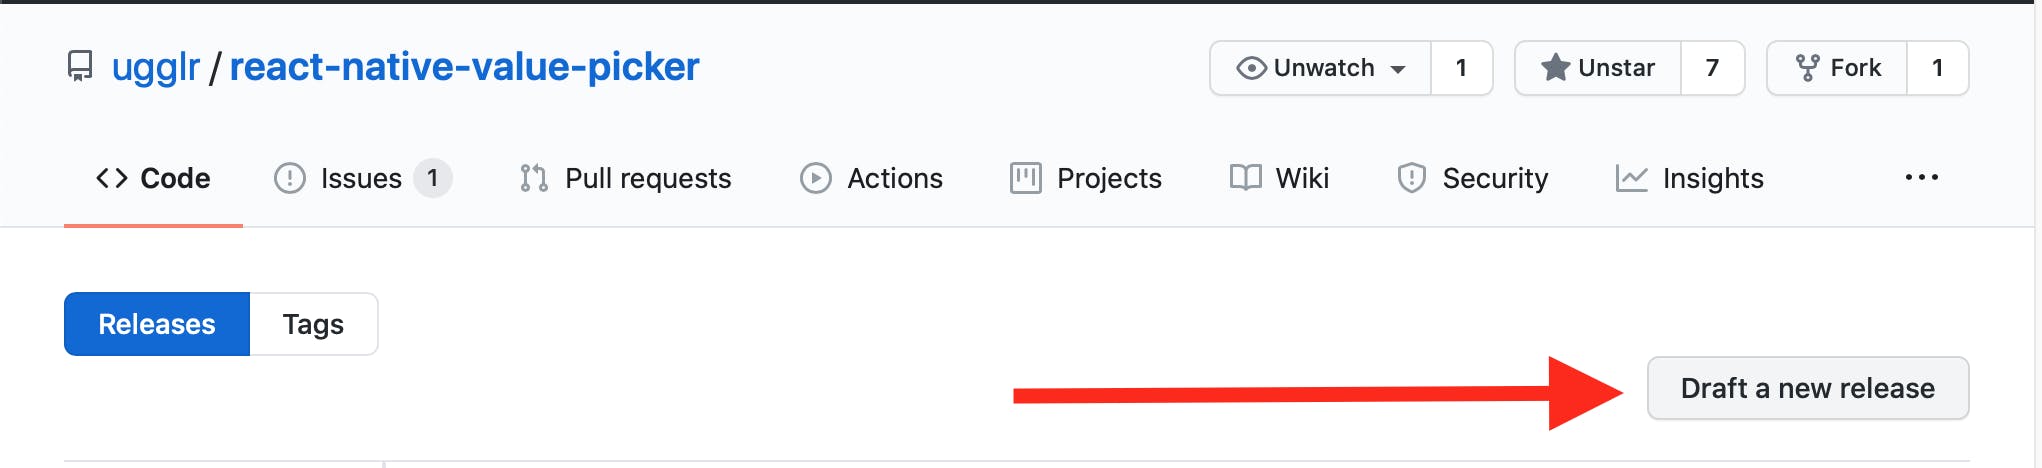
It does not really matter what tag you choose for the release, but make sure that the pre-release checkbox is not checked. And you bumped the version in package.json, NPM requires us to update the version when we publish changes.
When the release is done let's head on over to our repository's action tab and see if we have something running!
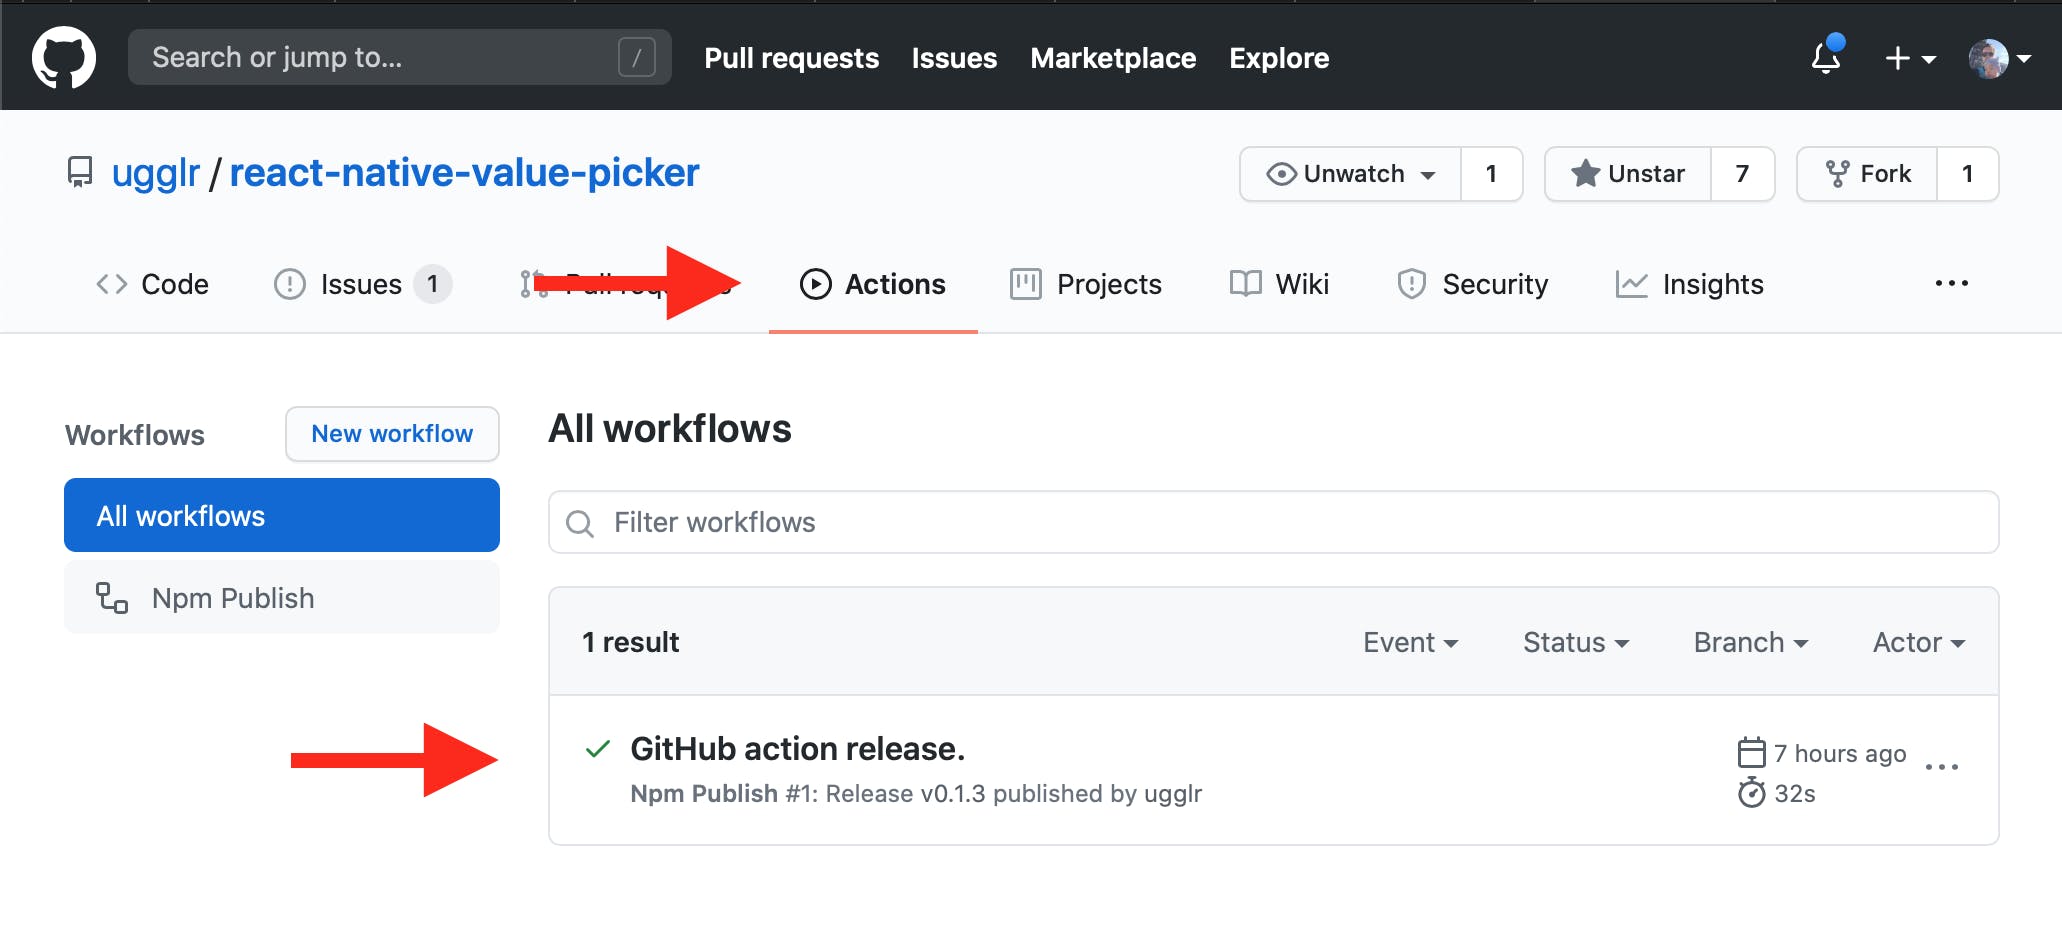
there we go, microphone drop.
End
If you like to visit the repo I've been working in it's available right here:
ugglr/react-native-value-picker
The package is available through NPM:
NPM: react-native-value-picker
And the creation of that package was part of a previous post right here:
DEV.to Cross platform react native scroll picker
Thanks for reading!
If you like my content consider subscribing It encourages me to write more 🥺
Looking for a remote software engineering job? Check out my side project at remoet.dev